Setting up a microphone stand may seem like a straightforward task, but it’s crucial to do it correctly to ensure the best audio quality and stability during your recording or performance. Whether you’re a musician, podcaster, or simply someone who needs to use a microphone, this step-by-step guide will walk you through the process of setting up a microphone stand like a pro.
Before we dive into the nitty-gritty of setting up a microphone stand, let’s understand why it’s essential. A properly set up microphone stand ensures that your microphone is positioned correctly, reducing handling noise, and allowing you to focus on your performance or recording without interruptions.
Feel free to explore a comprehensive guide on the best microphone stands at https://www.soundmaximum.com/best-mic-stand/ for expert recommendations and insights to elevate your audio recording and performance experience.
Choosing the Right Microphone Stand
When embarking on the journey of setting up a microphone stand, your initial and pivotal task revolves around the meticulous selection of the ideal stand to cater to your unique requirements. Several critical considerations come into play during this selection process. Begin by assessing the nature of the microphone you intend to use. Delve into aspects such as the microphone’s type, be it dynamic, condenser, or ribbon, and contemplate whether a floor stand or a desk stand aligns better with your specific purposes. Furthermore, ponder the weight of your microphone as it significantly influences the stand’s stability and effectiveness. Ensuring a harmonious match between the stand and your microphone’s size and weight is paramount to the success of your setup.
Gathering the Necessary Tools
Preparing for the assembly of your microphone stand necessitates gathering a concise yet indispensable set of tools and components. To embark on this endeavor seamlessly, you should ensure that the following items are at your disposal:
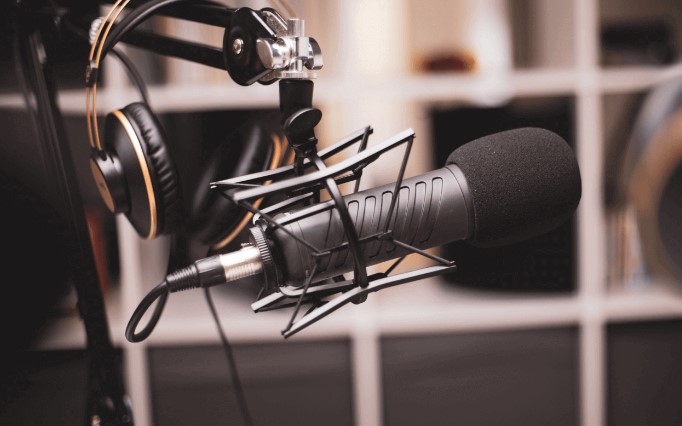
- The microphone stand, which serves as the foundational support for your microphone.
- A microphone clip or shock mount, crucial for securely affixing your microphone to the stand and minimizing vibrations.
- A microphone cable, facilitating the connection between your microphone and audio recording equipment.
- Last but not least, the microphone itself, the heart of your audio capture system.
Prioritize the readiness of these essential elements before commencing the assembly process, ensuring a smooth and efficient setup for your microphone stand.
Assembling the Microphone Stand
Let’s delve into the step-by-step process of assembling your microphone stand with precision and confidence:
- Begin by ensuring a stable foundation: Commence the assembly by gently spreading the tripod legs of the stand. This initial step lays the groundwork for stability during use, reducing the risk of wobbling or tipping over.
- Optimize the stand’s height: Next, extend the central shaft of the microphone stand to reach your desired height. This adjustment is pivotal as it determines the microphone’s positioning for optimal audio capture. Whether you’re standing or sitting, ensure the microphone is at the ideal level for your comfort and performance needs.
- Secure the height adjustment: Once you’ve adjusted the height to your satisfaction, firmly tighten the height adjustment knob. This action locks the central shaft in place, preventing unintended height changes during use and maintaining a consistent microphone placement.
- Affix the microphone clip or shock mount: To complete the assembly, attach the microphone clip or shock mount to the top of the stand. This component is crucial for securely holding your microphone in place, reducing vibrations, and enhancing sound quality.
By meticulously following these assembly steps, you’ll ensure that your microphone stand is set up correctly, setting the stage for professional-quality audio recordings or performances.
Adjusting the Height
Achieving optimal sound quality hinges on a fundamental aspect: adjusting the height of your microphone stand with precision. The significance of this step cannot be overstated. It revolves around ensuring that your microphone is positioned at an ideal height, one that aligns seamlessly with your comfort and performance requirements. A microphone set at the perfect height allows you to speak or sing directly into it, eliminating any undue strain or discomfort. This not only enhances the clarity of your audio but also contributes to a smoother and more enjoyable recording or performance experience. So, when fine-tuning your microphone stand’s height, prioritize achieving that sweet spot where your voice effortlessly meets the microphone, setting the stage for impeccable sound production.
Securing the Microphone
After achieving the optimal height for your microphone stand, the next pivotal step is to firmly affix your microphone to the clip or shock mount. This secure attachment is essential to prevent any accidental falls or disruptions during use, ensuring a stable and uninterrupted recording or performance. A firmly secured microphone guarantees that your sound remains consistent and that you can focus entirely on your creative work without worrying about equipment mishaps.
Testing for Stability
To verify the stability of your microphone stand, lightly tap or shake it. If you notice any wobbling or a sense of instability, it’s imperative to take corrective action promptly. Adjust the tripod legs to ensure a firm footing, and tighten all knobs securely. This meticulous attention to stability guarantees that your microphone stand can withstand the demands of recording or performing, eliminating any potential disruptions that may compromise your audio quality and overall experience.
Cable Management
To maintain a tidy and hazard-free setup, it’s advisable to neatly route the microphone cable along the stand’s tubing. Secure the cable in place using cable ties or clips. This practice not only enhances safety by preventing tripping hazards but also lends a professional and organized appearance to your microphone setup.
Tips for Different Types of Microphones
Depending on whether you’re using a dynamic, condenser, or ribbon microphone, there may be specific considerations for placement and setup. Research your microphone type for optimal results.
Common Mistakes to Avoid
Avoid these common microphone stand setup mistakes:
- Over-tightening the adjustment knobs, which can damage the stand.
- Using a stand that’s not suitable for the microphone’s weight.
- Not securing the microphone properly, leading to it falling off during use.
Maintaining Your Microphone Stand
Regularly check your microphone stand for any loose screws or damaged parts. Clean it as needed to ensure longevity.
Conclusion
Setting up a microphone stand correctly is the foundation for clear and uninterrupted audio recordings or performances. Follow the steps outlined in this guide to ensure your microphone stand is stable, secure, and ready for action.